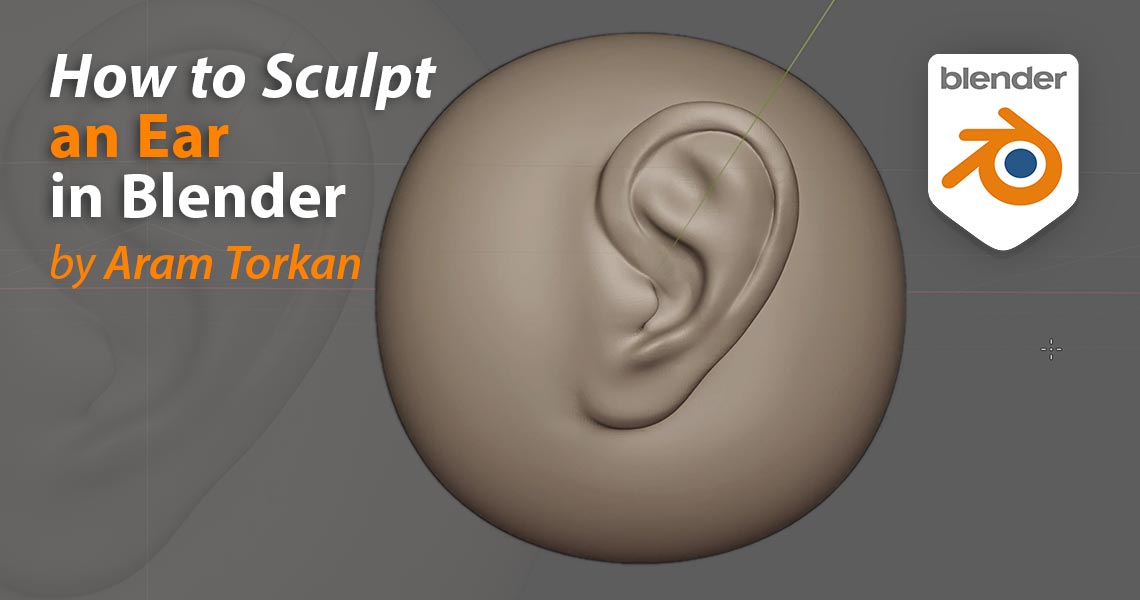
Interview with Aram Torkan, a 3D artist who uses Blender for sculpting. Aram has a Youtube channel where she posts tutorials every week on Sculpting and 3D Modeling
At the end of the interview, you can find a Tutorial on “How to sculpt an ear in Blender 3D”.
Tell us about yourself and your art
My name is Aram Torkan and I was born in January 1995.
Actually, I got a degree in biomedical engineering but I wasn’t into that at all because I love the arts!
So I started experiencing different fields like creating 2D animations by Moho and motion graphics by After Effects for 2 years.
After a while, I told myself that learning 3D modeling beside 2D animation would be fun! So I started learning Cinema 4D and I realized that I’ve become a big fan of 3D character modeling! So I knew that I found my favourite art and I had to pursue my interest!
Then I became familiar with digital sculpting and since then I’ve tried to improve my skills.
2. What do you like about sculpting?
The most important thing that I like about digital sculpting is that when you want to create a new character, if you use sculpting methods, you’ll be able to create complex details that would be impossible with traditional 3d modeling methods and you have a great freedom!
3. How have you started using Blender?
Actually, when I first started learning 3D modeling in Cinema 4D, I heard about Blender as a free software that has powerful sculpting and modeling sections. So I started building my new characters with it and I realized that yeah! It’s a really great program for 3D modeling and sculpting! So I really recommend it!
4. You have opened a very useful Youtube channel (Aram Torkan) with many Blender tutorials about sculpting and modeling. Why did you decide to open it? Tell us about this project.
I started opening my youtube channel on January 2021. You know I really like creating useful content and I like working as a content creator on social media. So I decided to open a youtube channel to be able to share tutorials about my sculpting workflow and processes of my character creation.
5. In your channel you teach Blender, Zbrush and Cinema 4D. What do you think are the strengths of Blender compared to other software?
All of these software are so powerful but it depends on the work you want to do. For example Cinema 4D is so powerful for motion graphics but for sculpting and 3D modeling, I prefer working with Blender and Zbrush because they offer you a wide variety of facilities for this purpose and at the moment I make 3D modeling and sculpting tutorials in Blender and Zbrush.
6. Do you think Blender can improve his sculpt tools in any way? Are there any things that could work better?
Yeah! Definitely, Blender can be improved in the future, especially its sculpting section! I think if it offered more facilities for sculpting, it would help a lot!
In my opinion, the performance of Blender needs to be improved when we sculpt high poly mesh which is irritating sometimes!
Links to Aram

Tutorial: How To Sculpt An Ear In Blender
In this tutorial, I’m gonna explain an easy method for ear sculpting in just 1 minute! You can learn the method and use it for sculpting ears in any software you use like Zbrush, Blender and so on. So let’s start!
Step 1: Start with a basic shape
In this part, I created this base for just practising ear sculpting.
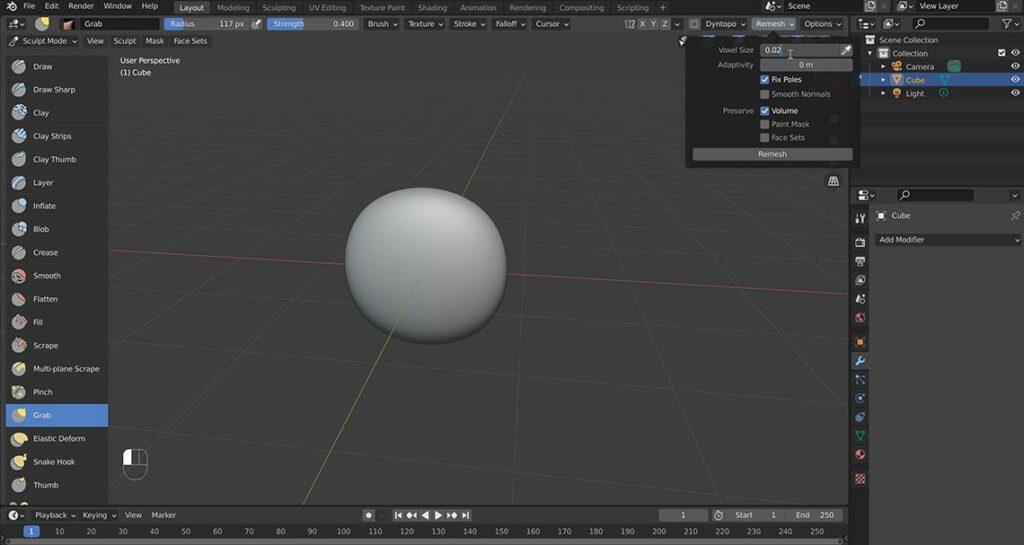
First hold the Shift+A hotkey down, choose a cube, and add a Subdivision Surface modifier or ctrl+5 and apply it. Go to Sculpt Mode and in the Remesh section, change the voxel size to 0.02 and press ctrl+R to remesh it. Then hold the shift key down and smooth this base. So you have a base for practising sculpting.
Step 2: Blocking out the ear
In this step, we’re gonna create the volume of an ear using the Mask brush.
First press M hotkey for masking this area. Then start creating the shape of the ear with a Mask brush.
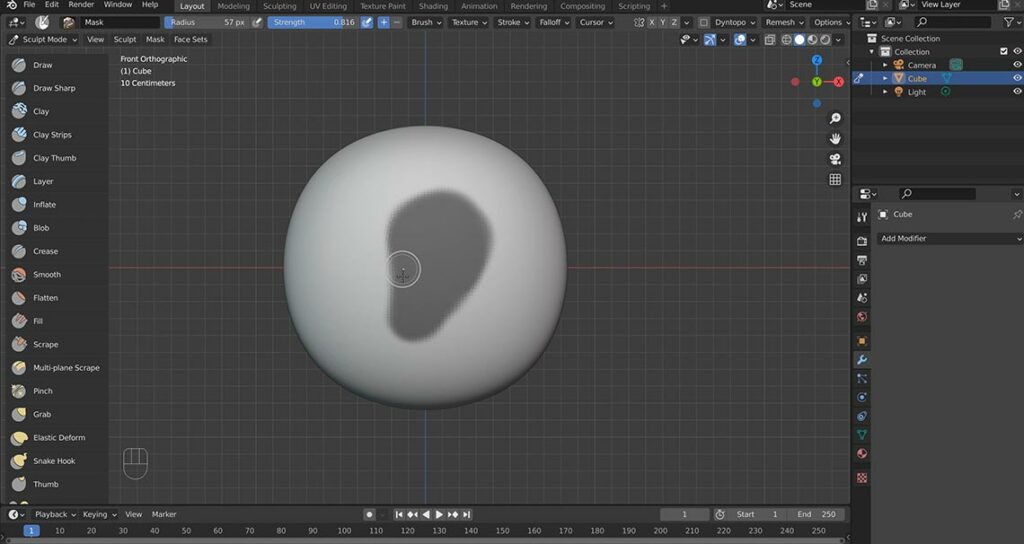
After that, press Ctrl+I and invert the mask and in the right view, drag the ear to the outside.
Make sure to check it from all angles! After dragging the ear, press Ctrl+M to unmask the area, go to the Remesh section and change the voxel size to 0.01 and press Ctrl+R to remesh it. Then hold Shift and smooth it.
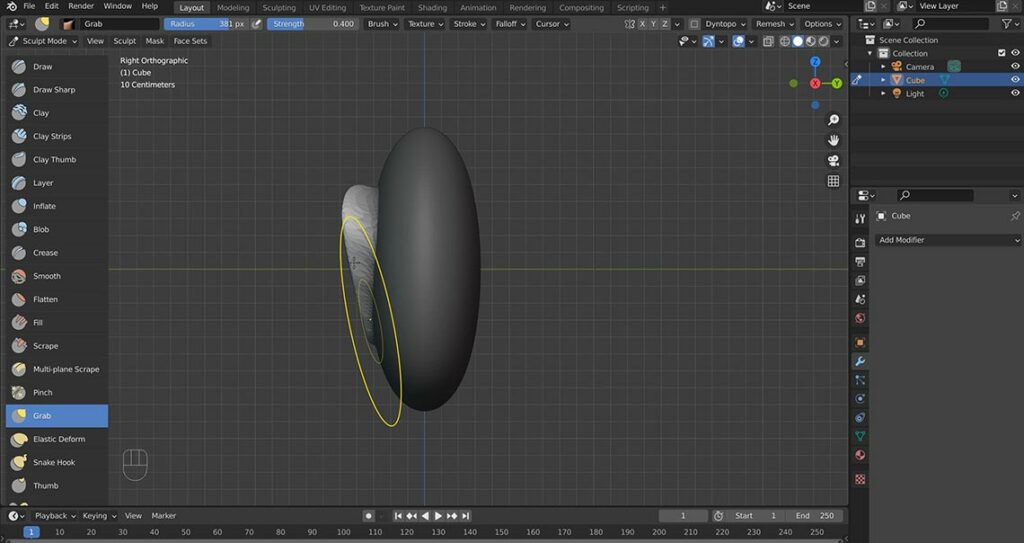
After dragging the ear, press Ctrl+M to unmask the area, go to the Remesh section and change the voxel size to 0.01 and press Ctrl+R to remesh it. Then hold Shift and smooth it.
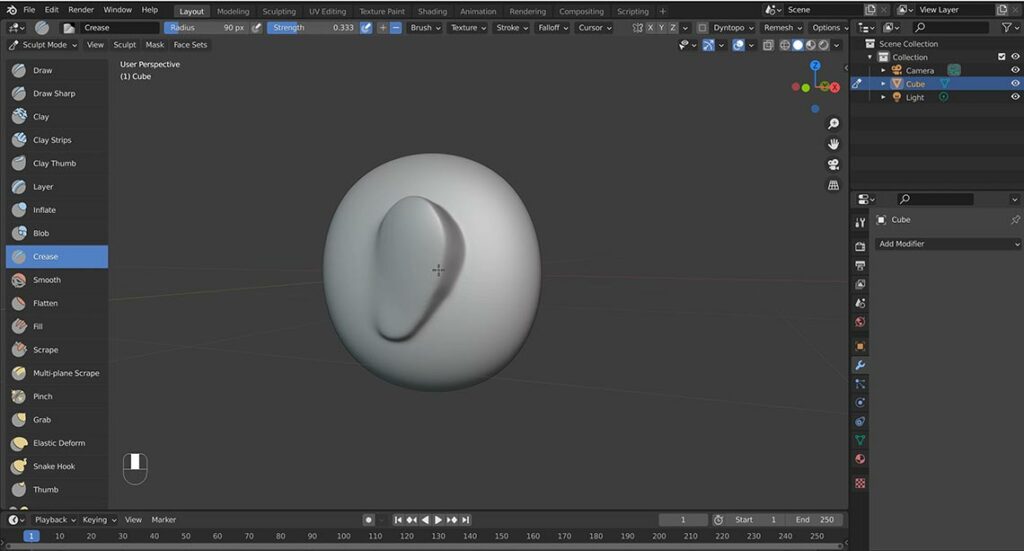
Now you need to choose the Crease brush and use that for removing the volume of the back of the ear like this.
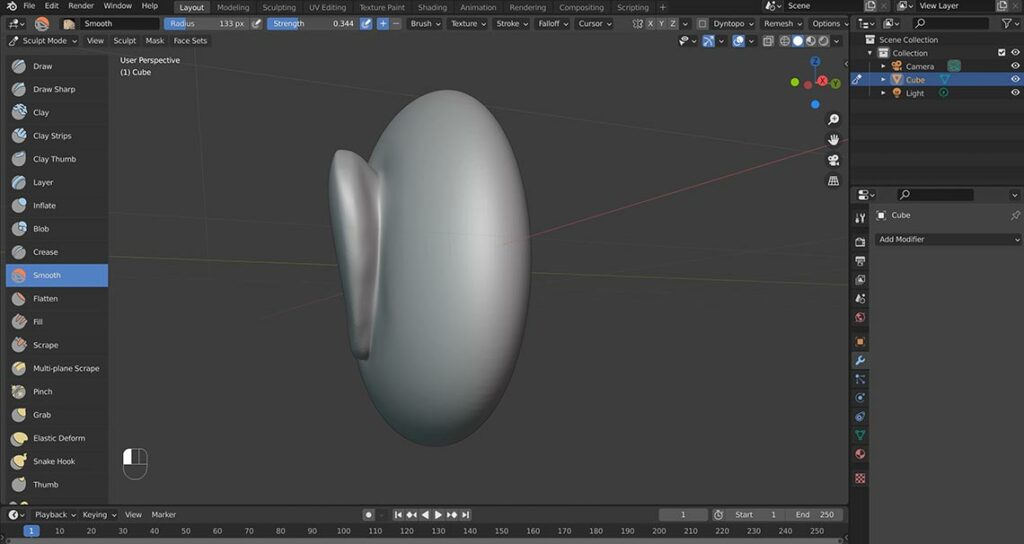
Step 3: Define the ear with few lines
In this step, you can sketch a few lines with the Draw Sharp brush on the ear in order to identify different parts of the ear because it helps you to continue sculpting easier.
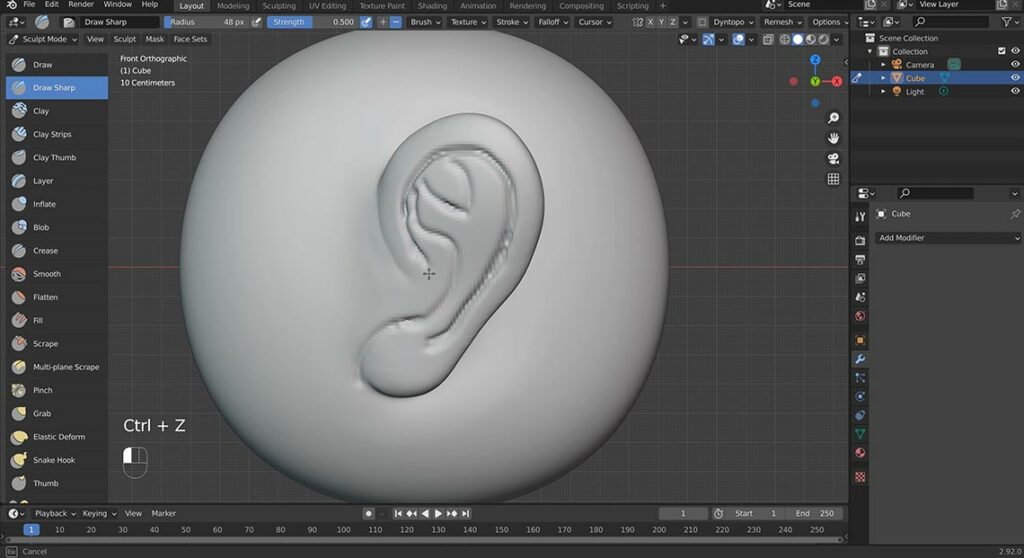
After drawing those lines, choose the Clay Strips brush to carve these areas as you can see in the picture below and add volume to the other parts. Then smooth all the parts.
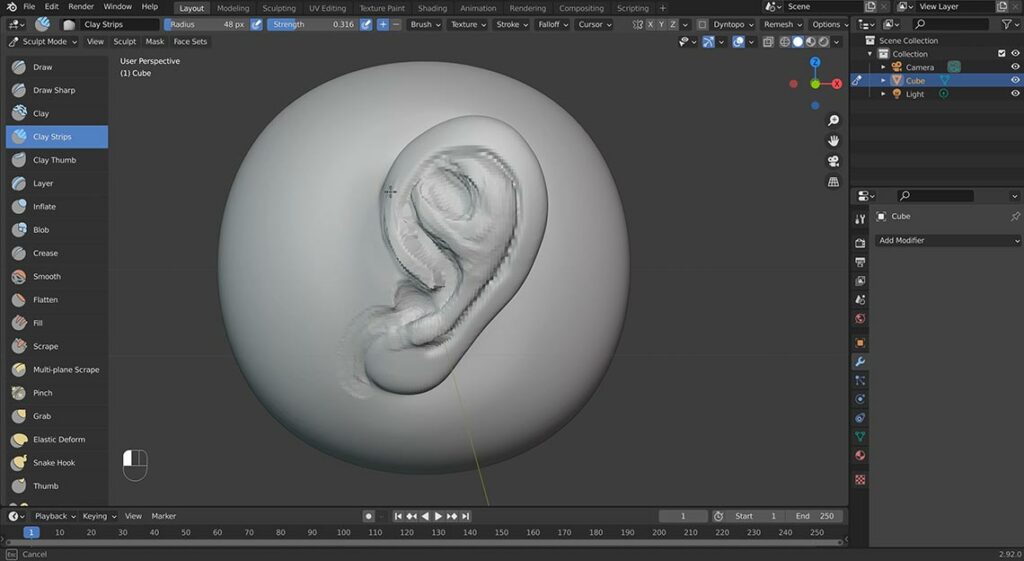
Step 4: Separate different parts
In this part, by using the Move brush, try to make the ear hole and move the other parts as well. Then choose the Crease brush to separate different parts of the ear more than before and smooth it.
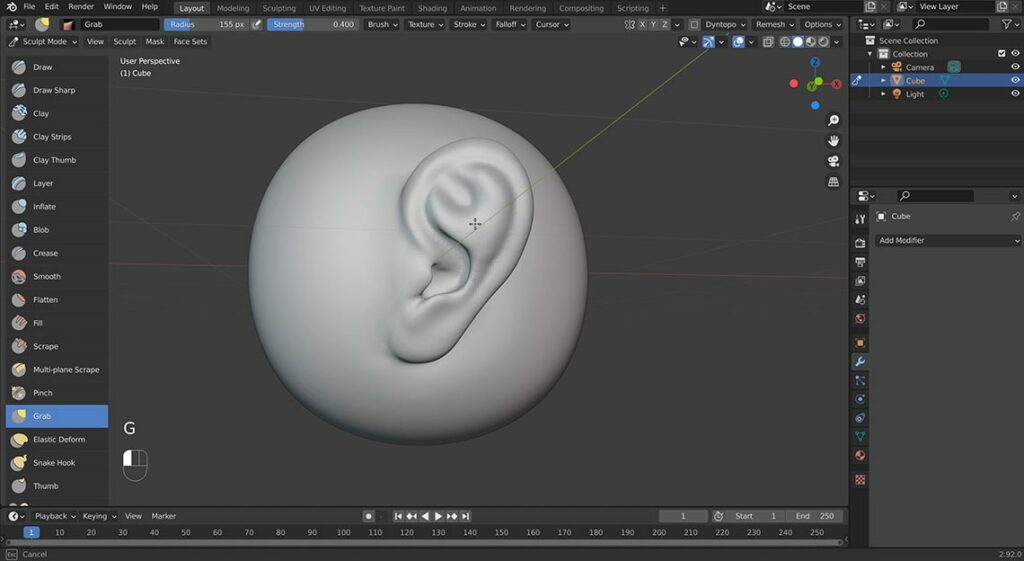
Step 5: Refine your model
This part is a kind of refinement. You just need to use different brushes in order to clean the ear sculpting. I used the Draw Sharp brush to increase the depth of the lines and the Crease brush to define the edge of the ear.
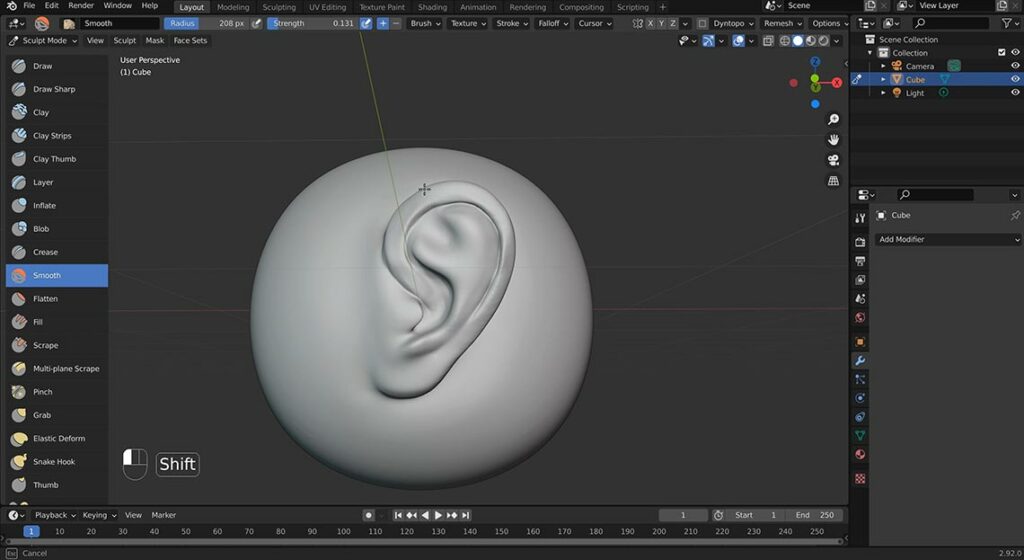
Then I used the Scrape brush to flatten the edge like this! Remember, if you like to have a more stylized ear, you could use the Scrape and the Crease brushes more until you have a more boxy and stylized ear.
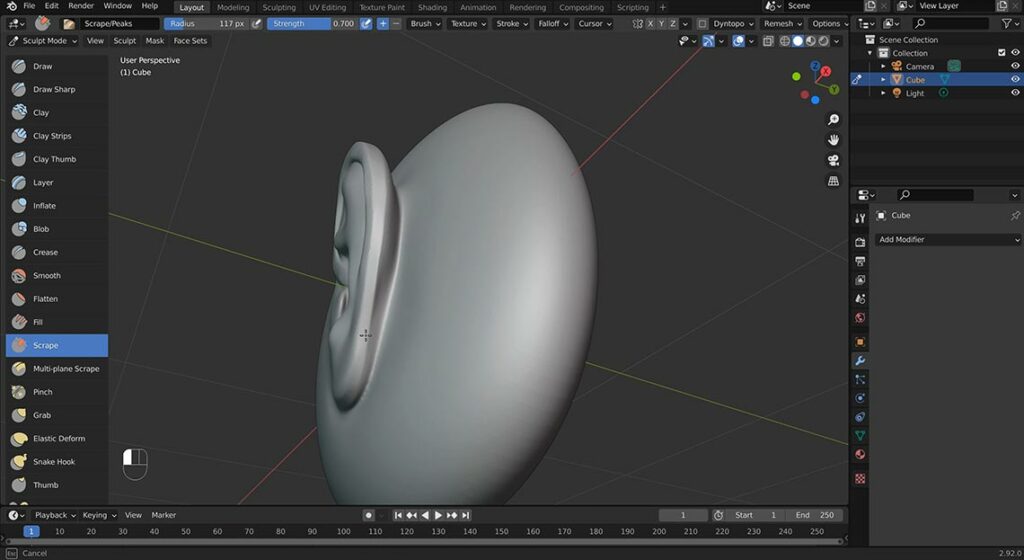
Step 6: Check your job from different angles for the few final tweaks
Finally in this step, you should check the ear from all angles to make sure your ear sculpting seems nice.
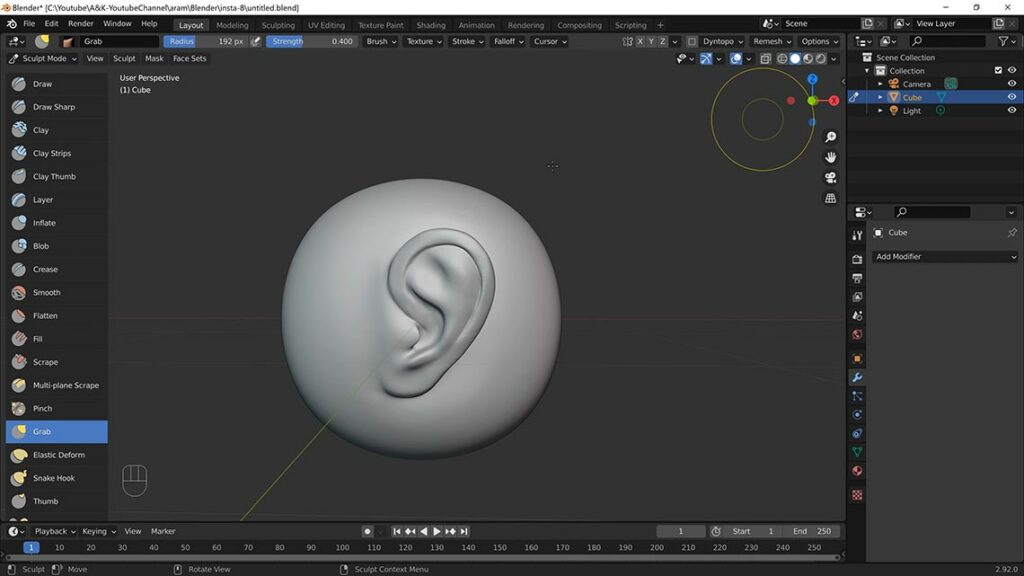
Guys! I try to make it look so easy but it definitely needs hours of practicing!
I upload the sculpting video tutorials per week including “1 Minute Sculpting Tutorials” and “Full Sculpting Tutorials”. So You can subscribe to my youtube channel for new sculpting tutorials. Thank you!
Links for my useful tutorials:
Article realised in collaboration with Doriana Pompili:


